本文最后更新于 2025年7月14日 凌晨
🎯 本文介绍如何使用 burp 插件配合 ddddocr 实现自动验证码识别,支持新版 Burp Suite,提升渗透测试效率。
🔗 插件下载
https://github.com/f0ng/captcha-killer-modified
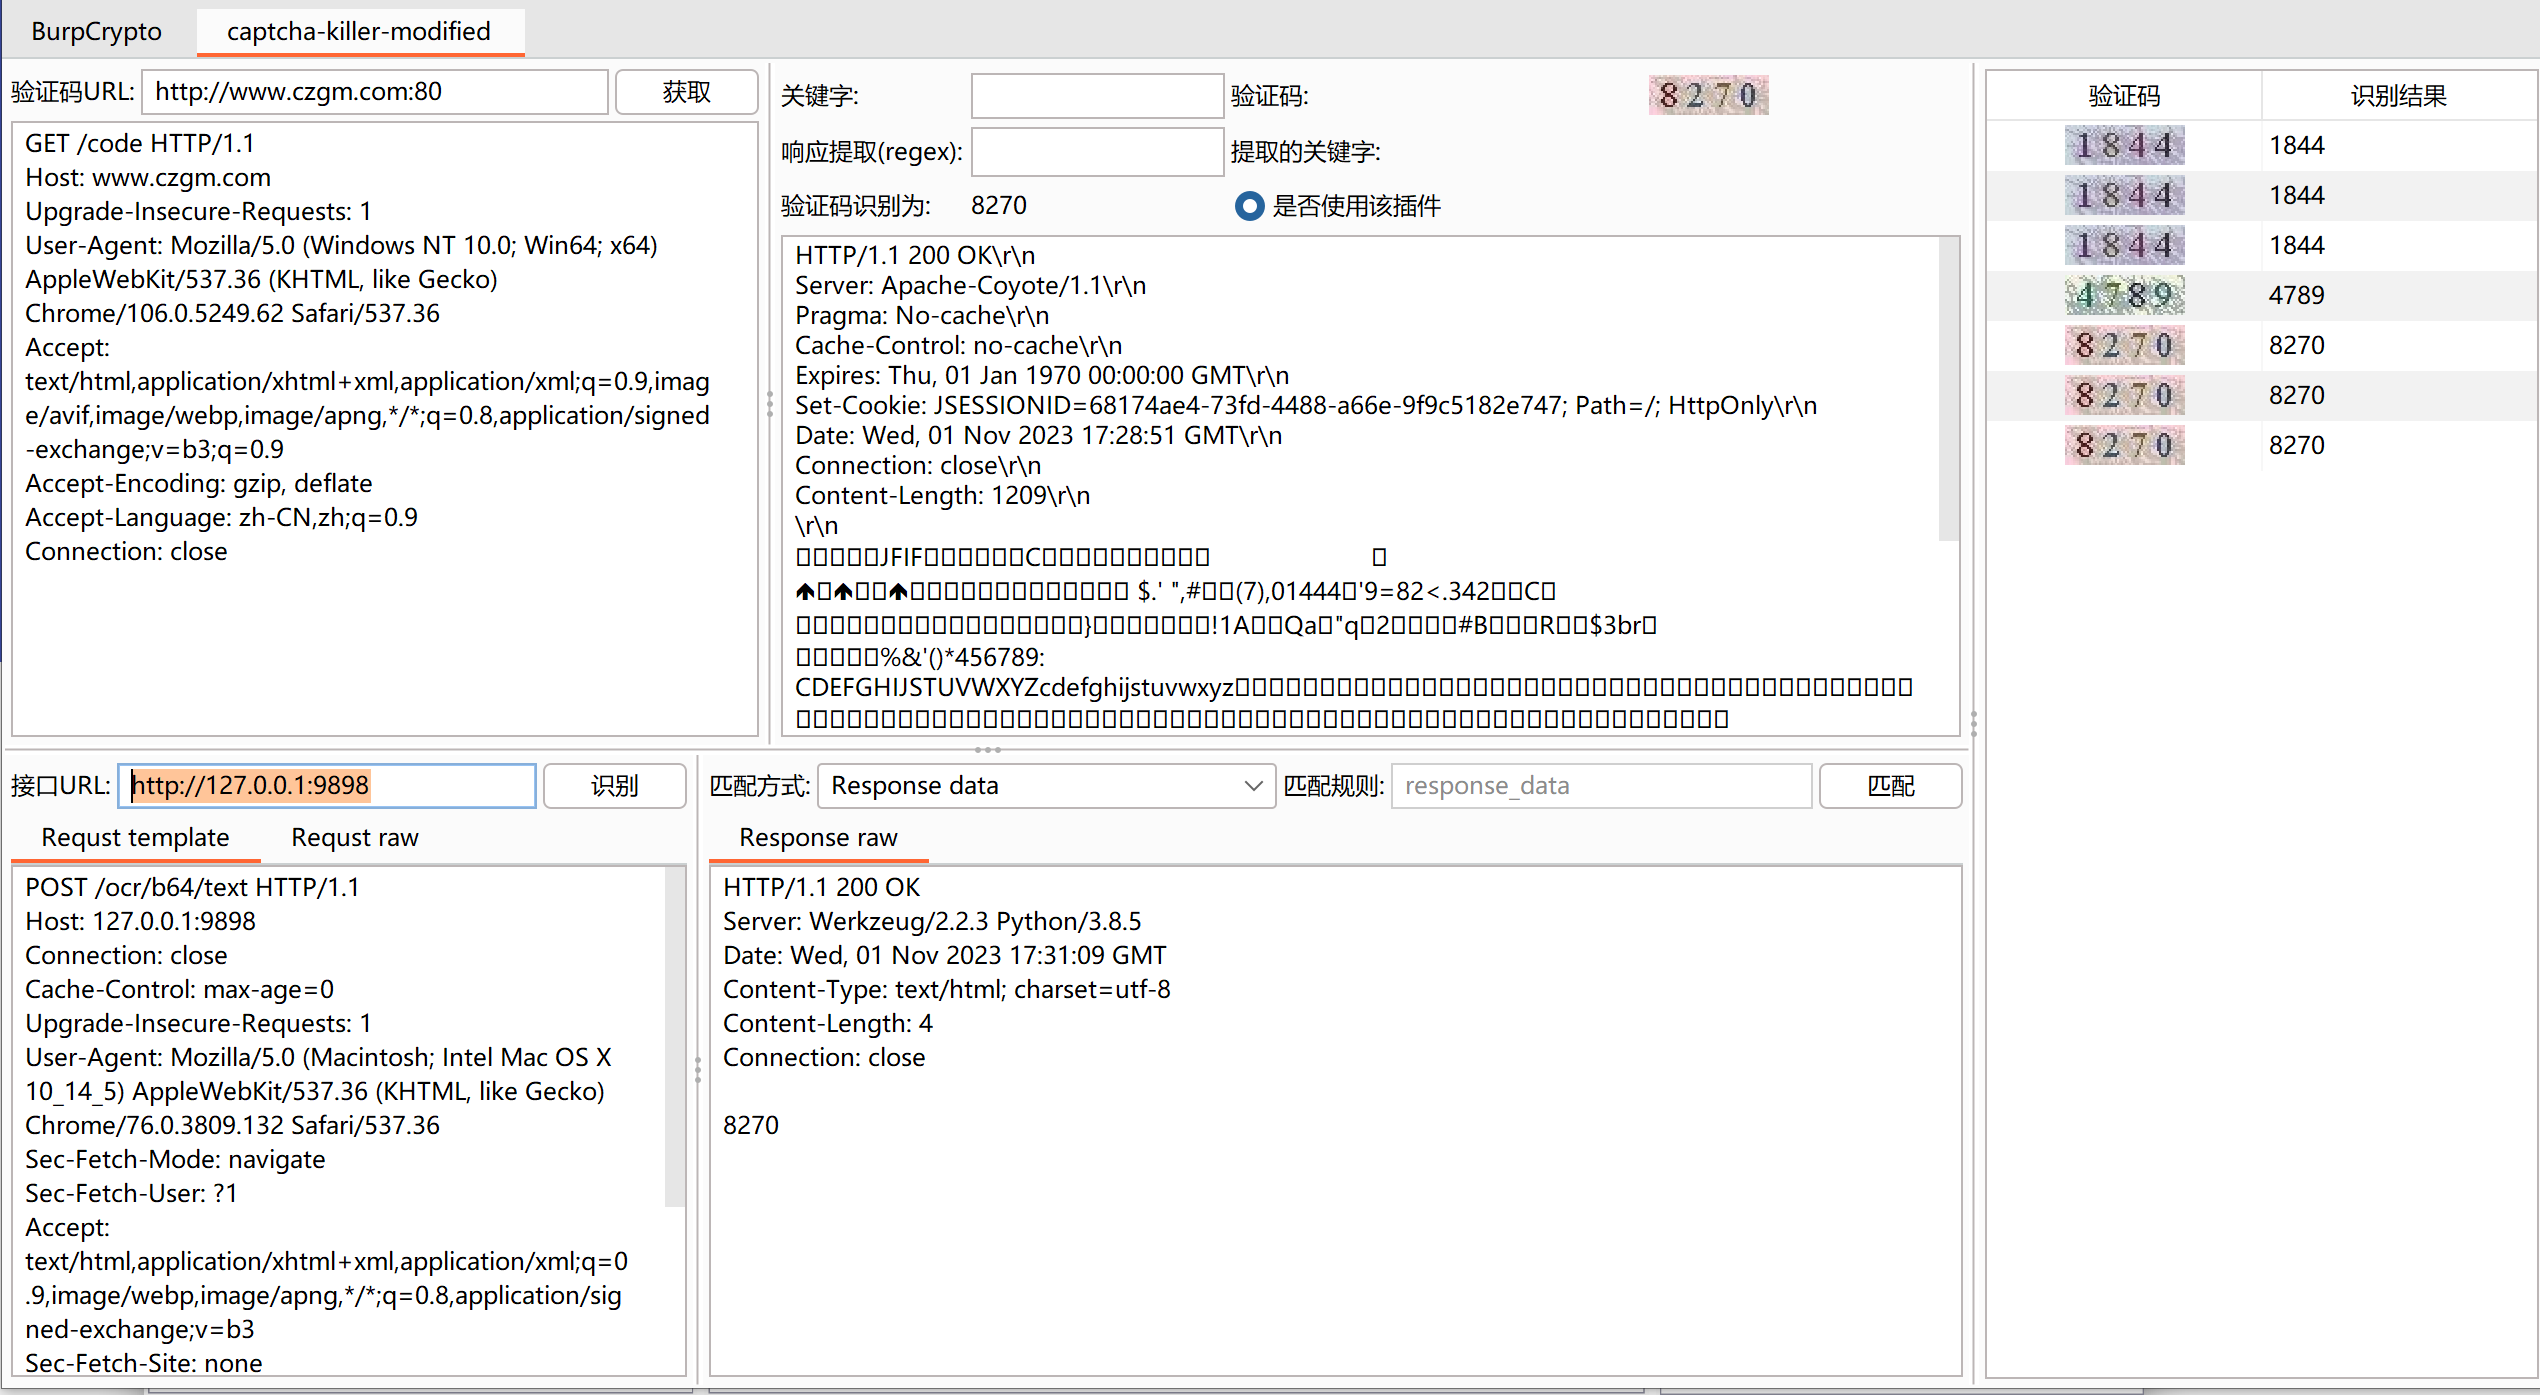
1、Burp 插件配置
在 Burp Suite 中导入插件后,打开插件面板,进行相应配置:
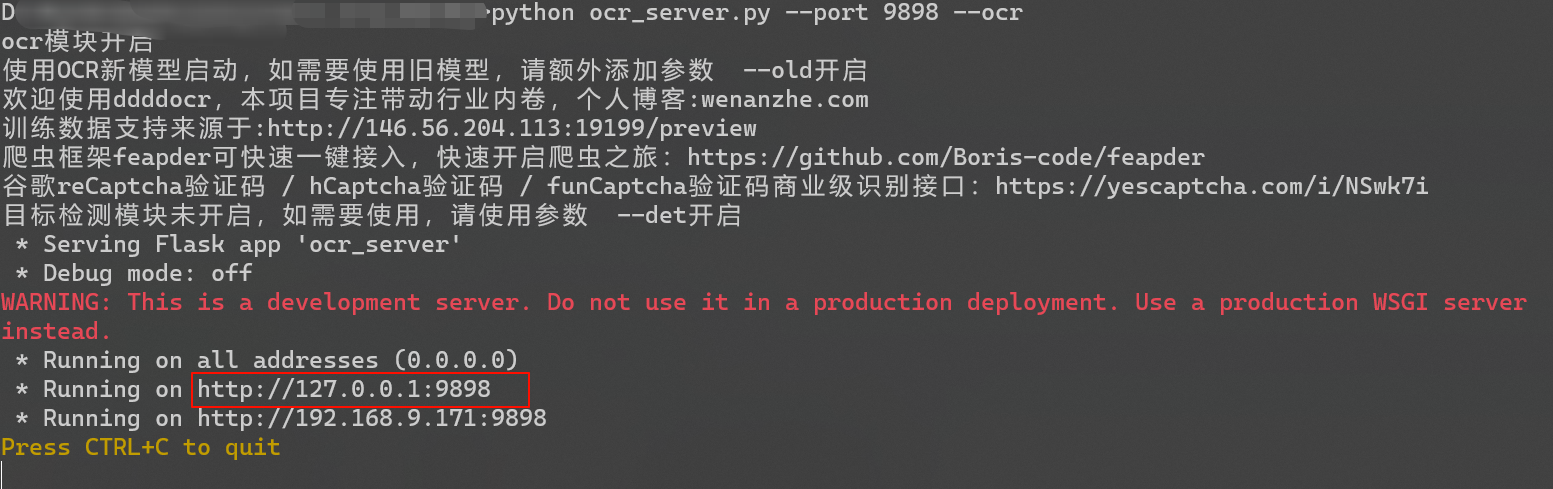
2、本地启动验证码识别服务
执行以下命令启动本地 OCR 服务,默认监听端口 9898:
1
| python ocr_server.py --port 9898 --ocr
|
启动成功界面:
3、插件请求配置
右键发送验证码请求包到插件,填写验证码识别接口地址:
4、请求包示例
插件发送的请求示例如下,使用 POST 方法,内容包含 Base64 编码的图片数据:
1
2
3
4
5
6
7
8
9
10
11
12
13
14
15
16
| POST /ocr/b64/text HTTP/1.1
Host: 127.0.0.1:9898
Connection: close
Cache-Control: max-age=0
Upgrade-Insecure-Requests: 1
User-Agent: Mozilla/5.0 (Macintosh; Intel Mac OS X 10_14_5) AppleWebKit/537.36 (KHTML, like Gecko) Chrome/76.0.3809.132 Safari/537.36
Sec-Fetch-Mode: navigate
Sec-Fetch-User: ?1
Accept: text/html,application/xhtml+xml,application/xml;q=0.9,image/webp,image/apng,*/*;q=0.8,application/signed-exchange;v=b3
Sec-Fetch-Site: none
Accept-Encoding: gzip, deflate
Accept-Language: zh-CN,zh;q=0.9
Content-Type: application/x-www-form-urlencoded
Content-Length: 55
<@BASE64><@IMG_RAW></@IMG_RAW></@BASE64>
|
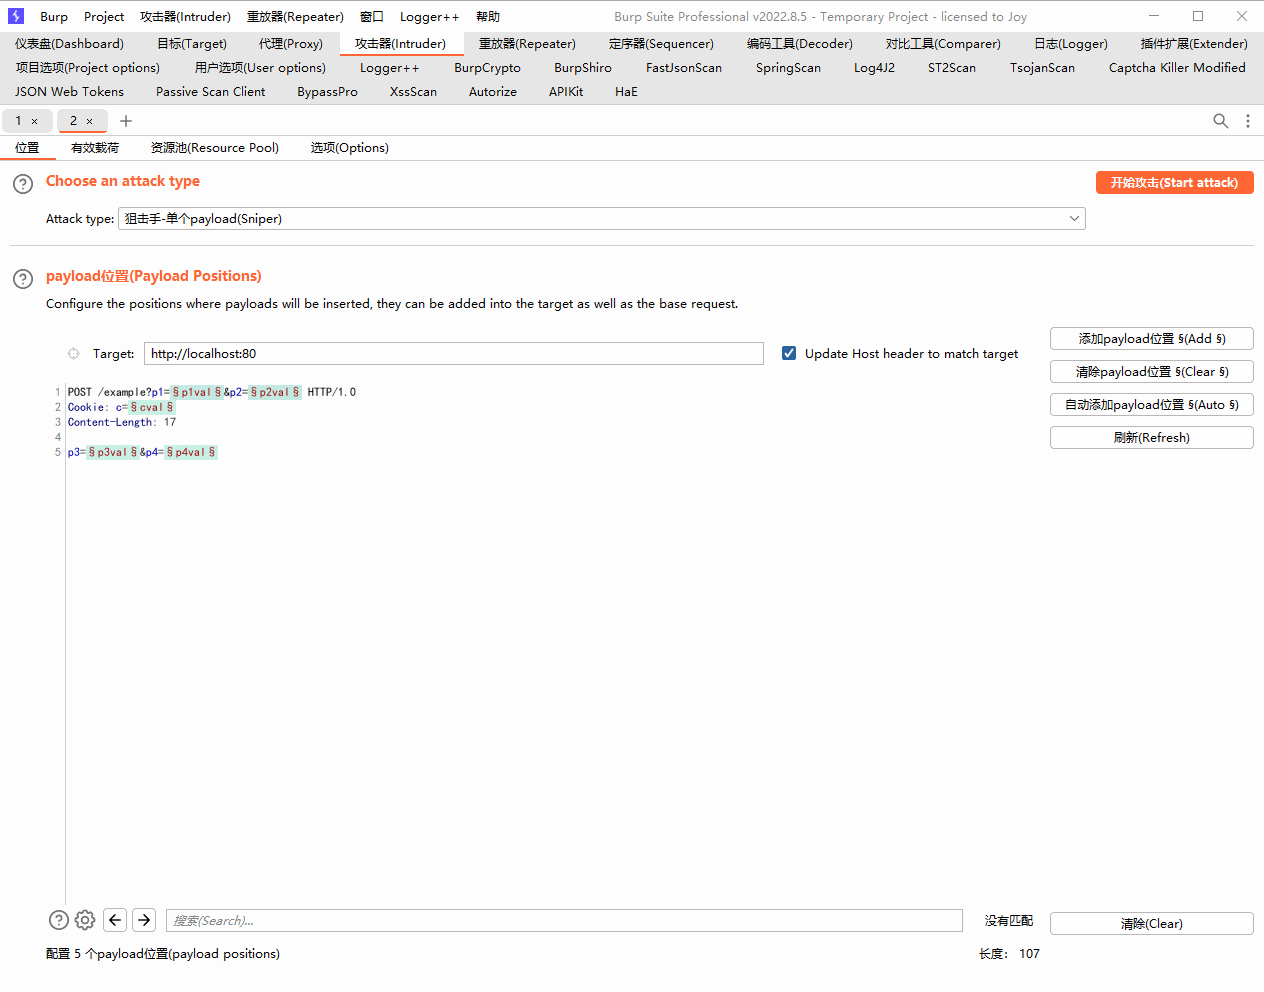
5、在 Intruder 模块中调用
将验证码识别插件集成到 Burp Intruder,自动识别并填充验证码,提升批量测试效率。
✨ 这样一来,Burp Suite 就能智能自动识别验证码,大大降低了手动输入验证码的繁琐工作,提升渗透测试效率。祝你使用愉快!🚀